
Thursday, December 16, 2010
Wednesday, December 15, 2010
Holiday Forest
Here is the flythrough for my forest. The trees are a standard asset because I couldn't figure out how to get my custom tree to display. The ground textures are created by me though.

Island Flythrough
Most of the textures were pictures I found online and edited to be seamless. I did make a grass texture, but it just supplemented the grass mesh found in the editor. I also managed to run this through Unity Pro, so I have some nice shadows and water. It's a bit dark, but the skybox I used was dusk, and I didn't think increasing the light in the shadowed areas would look right with that lighting.
mountain lake final


This my scene with reflective water. The second picture is to show a close up of my textures on the trees and lake.
Tuesday, December 14, 2010
Island


 I did an Island in unity. I made all the textures for the land, and I used the prebuild water, trees, and sky. This was my first time with unity and I enjoyed it.
Unity Project

 Did a beach scene from a D&D campaign I wrote. Players have actually played through this beach and I thought it would be fun to make it. PS this place is HUGE, in game the player is about half the size of those trees.
Wednesday, December 8, 2010
Current Work in Progress
 This is my current work in progress on the environment. I'm going to modify it to be more of an actual island, as the clipped geometry is buggin me. Now, the player would never see this, but it might be a good idea to make some visual sense as to why they can't go outside the boundaries. I also am working on making the textures a higher resolution.
Monday, December 6, 2010
Mountain Lake

I decided to do a autumn scene at dusk for my terrain. I am using a mixture of premade/stock textures, but I am hoping that I can create most of the textures in the scene.
Sunday, December 5, 2010
For my environment I'm working on a Christmas-y type forest. I wasn't planning on putting snow in, but I might if I don't like the way it looks.
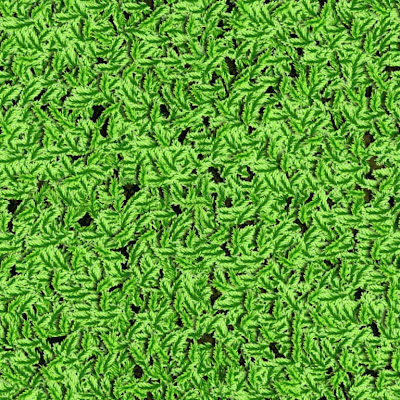
The ground texture is supposed to be pine needles and needle clumps off of evergreen trees. I might also make a plain dirt version for paths.
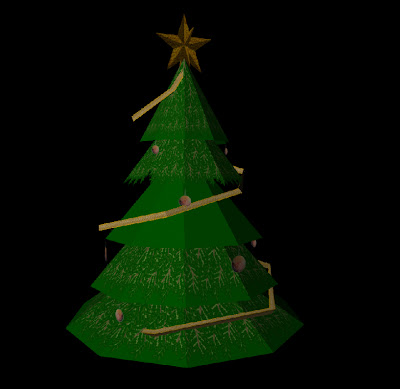
My trees are all sort of Christmas trees. This is one in progress, though it doesn't look very good at the moment. Hopefully it'll look better in the engine. I don't have an actual environment map set up yet, I figure I'll do that last and place everything in at the end.

Thursday, December 2, 2010
Island in Unity


I'm creating a creepy looking island (which just happens to be creepy because there's too much fog and the island can't invest in a lighthouse). I'm using a mixture of custom created textures and a couple built in ones.
Unity Environment
I'm making an arctic scene. So far I have only used four textures but I plan to spruce it up a bit with a few more.
I'm almost done with the texturing and will move on to adding foliage of some sort, then some structures.

I'm almost done with the texturing and will move on to adding foliage of some sort, then some structures.

Monday, November 22, 2010
Tuesday, November 9, 2010
panteon half texture
This is what I have textured in zbrush for the panteon mesh. Since I had never used zbrush before, I decided to use this time to practice instead of trying to create a finished piece.
Working on this mesh was alittle difficult because of the many pieces that he was created in. In order to create a proper texture map I had to create a separate texture for each piece of armor and then bring them together in photoshop. On his face I attempted to play with the sculpting feature and I enjoyed playing with it even though my ear doesnt look as good in maya as it does in zbrush or the maya view port (darn render...).
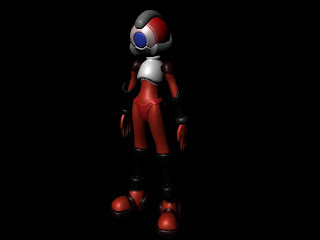


Working on this mesh was alittle difficult because of the many pieces that he was created in. In order to create a proper texture map I had to create a separate texture for each piece of armor and then bring them together in photoshop. On his face I attempted to play with the sculpting feature and I enjoyed playing with it even though my ear doesnt look as good in maya as it does in zbrush or the maya view port (darn render...).


Sunday, November 7, 2010
Fancy Dog

Most of this project was just me getting used to Zbrush's interface and "incredibly" control scheme. I think after climbing those mountains I discovered that the program is really, really cool. Thanks to Trevor, I also learned how to add some depth to my models and sculptures. I didn't produce anything super fancy (I probably should've), but I think this dog is pretty cool. I just took the default Zbrush dog, added some high tech dog glasses and rainboots, then textured him using Zbrush and some fur and rubber textures I found on the internet. Looking back I'm definitely going to mess with the ZSphere's a little more, because they seemed pretty nifty for just creating weird creatures.
Thursday, November 4, 2010
Insect Polypaint
This model was definitely a learning experience. I had a lot of issues with the mesh during the sculpting process. Overall the Polypainting is quite fun once you get into it. I threw a TV dinner into the microwave and half an hour later I remembered it was in there, but only because I got hunger pangs. haha
The computers at school can't handle loading my model for some reason even though it's at ~8.4 million polys. Weird.

The colors are a bit bland but since it's an insect, it can't stray too far from dark colors. I did try a wide range of color schemes and textures but I ended up liking this most. I spent about four hours or so texturing this, most of which was spent on cycling through textures after I decided the previous ones didn't fit.
Texturing in Zbrush

This was my first foray into using Zbrush. The model was not done by me, but I did all the texture work. The textures I used were all included in Zbrush, except for a rhino skin texture that I found on the internet. But I don't recall if I ended up having that in the final product. The shader used is the FastShader.
Monday, October 25, 2010
Sunday, October 24, 2010
Panteon Unwrapped


It was kind of annoying unwrapping this mesh because not only did it have many pieces but in many places the mesh wasnt all one piece. The shoes in particular were made in overlapping pieces and I had to work in xray shading most of the time trying to figure out how every thing was logically placed together. Also, because this was my first time unwrapping the uvs some of them didnt come out as smoothly as I would like.Lastly, I made sure to layout my pieces mostly in a head to toe fashion so that it would be easier to paint if I brought it into photoshop.
Thursday, October 21, 2010
Rhino UV Layout

While this isn't my first unwrapping job, this one has required the most effort. It's not perfect, and there are some elements of it that make me wonder what happened. Those parts are parts of the rhino that would most likely never be seen anyway, so I'm not very concerned. I only wish I had had more time to put toward this.
Crown UVs
This was my first-ever unwrapping... I think I did pretty well considering the complexity of the helmet.
This is the helmet belonging to a character named the Rook. Similarly named after the chess piece, he wears gear which represents castle-like structure.
Fun fact: The projections at the top of castles are called merlons, while the spaces inbetween are crenels.


This is the helmet belonging to a character named the Rook. Similarly named after the chess piece, he wears gear which represents castle-like structure.
Fun fact: The projections at the top of castles are called merlons, while the spaces inbetween are crenels.


UV Layout


This was my first time laying out UVs, so I decided to do so with a blocky, less organic model. After being confused for about an hour and a half (I was definitely over complicating things), something finally clicked and I was done in about 5 minutes. I did so by automatic unwrapping the entire thing with 6 faces then planar unwrapping specific parts and projected them to the plane I was viewing them from. It ended up working pretty well and, while it was an extremely simple model, I think I did good for a being a first timer.
Wednesday, October 13, 2010
Tuesday, October 12, 2010
Saturday, October 9, 2010
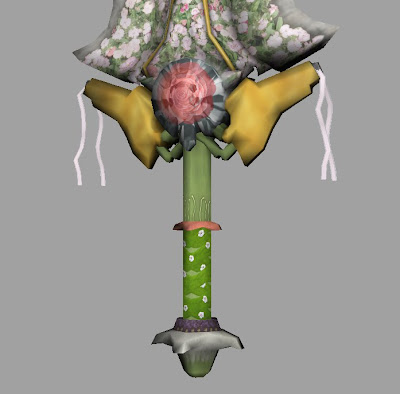
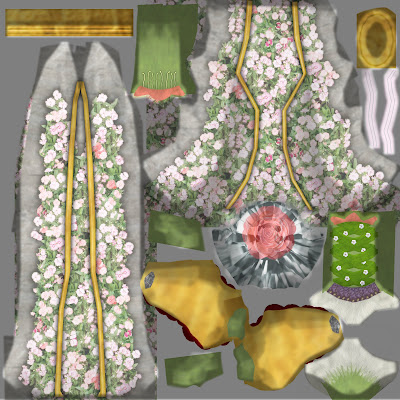
Wedding Sword of Holy Matrimony
At first I was going to go with a more nature type sword, but as I kept going I started leaning towards lighter colors and more flowers. After a while, it became a wedding sword.
If it was actually used in anything, it would probably just be a ceremonial sword used to marry two people, not to kill or maim.
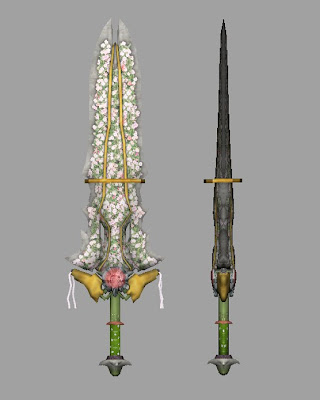
If it was actually used in anything, it would probably just be a ceremonial sword used to marry two people, not to kill or maim.


Thursday, October 7, 2010
Sword of War


This is not my best work, as I did not have much time, but I am pleased with what was accomplished in the time I had. The scratches, blood, and fire were hand painted with Blur's Good Brush set. The entire hilt was taken from pictures of handle grips, gems, and gold that I found online and adjusted the colour for. I also made a glow map out of my flame layer.
Project 2 - Darksiders Armageddon Blade
I started with a giant gemstone in the center. Then some runes. Every powerful sword needs some sort of enchantment to make it both powerful and indestructible. Afterward I came up with a way to connect the runes and show the energy coursing through the blade. I got my idea from Final Fantasy X: There are dungeons in that game with these little spheres you have to pick up and place into the appropriate receptacle. Once this is done, a solid blue gutter along the wall and floor is illuminated with something bright blue.
Next came the hilt. I really had no idea what to do with this portion so I started messing around. I wanted to add a sort of steampunk-esque or engineered feel to the blade so I made them look like containers of some sort of serum, which feed into the crystal, thus supplying it's cyan color.


Next came the hilt. I really had no idea what to do with this portion so I started messing around. I wanted to add a sort of steampunk-esque or engineered feel to the blade so I made them look like containers of some sort of serum, which feed into the crystal, thus supplying it's cyan color.


Textured dog


For this assignment I used what I learned on the tank project to help me keep organized. Because the texture is all one big piece however, i didnt have to color each part a crazy color. I used reference photos of a grey great dane in order to paint him in photoshop. The toughest parts where the facial area because the muzzle was not split evenly and I had to figure out what part went where. Also, I made my uvs small, so details like his eyes and the bottom his paws took a lot of patience to paint correctly. Overall I think I did a pretty good job. PS: I had to add a floor so that you could see his feet and he doesnt look like he is blending into the "darkness".
Subscribe to:
Comments (Atom)