Monday, October 25, 2010
Sunday, October 24, 2010
Panteon Unwrapped
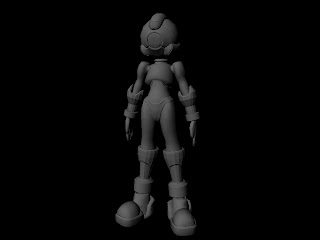
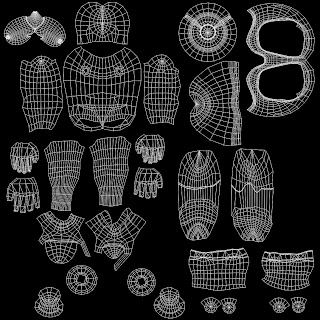
It was kind of annoying unwrapping this mesh because not only did it have many pieces but in many places the mesh wasnt all one piece. The shoes in particular were made in overlapping pieces and I had to work in xray shading most of the time trying to figure out how every thing was logically placed together. Also, because this was my first time unwrapping the uvs some of them didnt come out as smoothly as I would like.Lastly, I made sure to layout my pieces mostly in a head to toe fashion so that it would be easier to paint if I brought it into photoshop.
Thursday, October 21, 2010
Rhino UV Layout

While this isn't my first unwrapping job, this one has required the most effort. It's not perfect, and there are some elements of it that make me wonder what happened. Those parts are parts of the rhino that would most likely never be seen anyway, so I'm not very concerned. I only wish I had had more time to put toward this.
Crown UVs
This was my first-ever unwrapping... I think I did pretty well considering the complexity of the helmet.
This is the helmet belonging to a character named the Rook. Similarly named after the chess piece, he wears gear which represents castle-like structure.
Fun fact: The projections at the top of castles are called merlons, while the spaces inbetween are crenels.
This is the helmet belonging to a character named the Rook. Similarly named after the chess piece, he wears gear which represents castle-like structure.
Fun fact: The projections at the top of castles are called merlons, while the spaces inbetween are crenels.
UV Layout


This was my first time laying out UVs, so I decided to do so with a blocky, less organic model. After being confused for about an hour and a half (I was definitely over complicating things), something finally clicked and I was done in about 5 minutes. I did so by automatic unwrapping the entire thing with 6 faces then planar unwrapping specific parts and projected them to the plane I was viewing them from. It ended up working pretty well and, while it was an extremely simple model, I think I did good for a being a first timer.
Wednesday, October 13, 2010
Tuesday, October 12, 2010
Saturday, October 9, 2010
Wedding Sword of Holy Matrimony
At first I was going to go with a more nature type sword, but as I kept going I started leaning towards lighter colors and more flowers. After a while, it became a wedding sword.
If it was actually used in anything, it would probably just be a ceremonial sword used to marry two people, not to kill or maim.
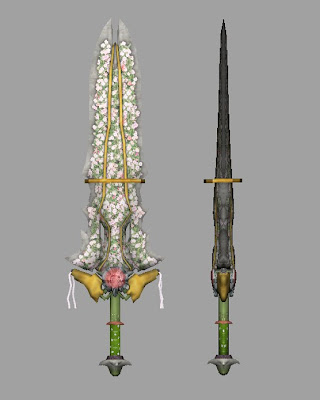
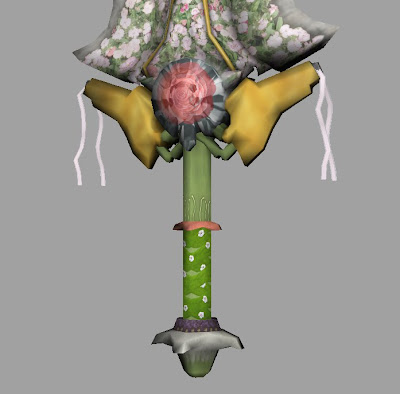
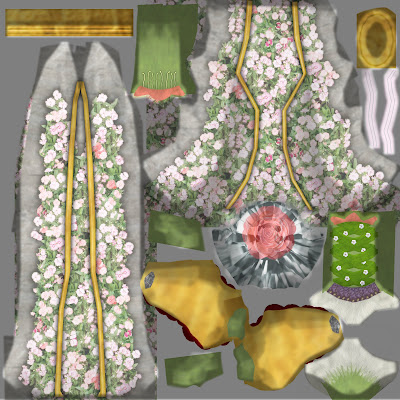
If it was actually used in anything, it would probably just be a ceremonial sword used to marry two people, not to kill or maim.


Thursday, October 7, 2010
Sword of War


This is not my best work, as I did not have much time, but I am pleased with what was accomplished in the time I had. The scratches, blood, and fire were hand painted with Blur's Good Brush set. The entire hilt was taken from pictures of handle grips, gems, and gold that I found online and adjusted the colour for. I also made a glow map out of my flame layer.
Project 2 - Darksiders Armageddon Blade
I started with a giant gemstone in the center. Then some runes. Every powerful sword needs some sort of enchantment to make it both powerful and indestructible. Afterward I came up with a way to connect the runes and show the energy coursing through the blade. I got my idea from Final Fantasy X: There are dungeons in that game with these little spheres you have to pick up and place into the appropriate receptacle. Once this is done, a solid blue gutter along the wall and floor is illuminated with something bright blue.
Next came the hilt. I really had no idea what to do with this portion so I started messing around. I wanted to add a sort of steampunk-esque or engineered feel to the blade so I made them look like containers of some sort of serum, which feed into the crystal, thus supplying it's cyan color.
Next came the hilt. I really had no idea what to do with this portion so I started messing around. I wanted to add a sort of steampunk-esque or engineered feel to the blade so I made them look like containers of some sort of serum, which feed into the crystal, thus supplying it's cyan color.
Textured dog
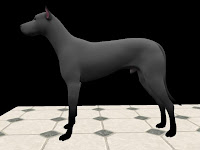
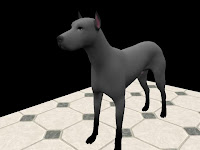
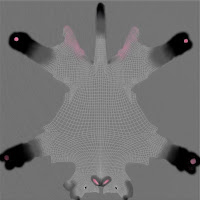
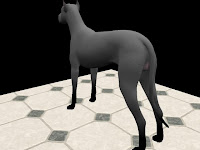
For this assignment I used what I learned on the tank project to help me keep organized. Because the texture is all one big piece however, i didnt have to color each part a crazy color. I used reference photos of a grey great dane in order to paint him in photoshop. The toughest parts where the facial area because the muzzle was not split evenly and I had to figure out what part went where. Also, I made my uvs small, so details like his eyes and the bottom his paws took a lot of patience to paint correctly. Overall I think I did a pretty good job. PS: I had to add a floor so that you could see his feet and he doesnt look like he is blending into the "darkness".
Rhino Texture
 For this texture I started out with a base color for the rhino. From there I added an ambient occlusion over the whole texture. Then I made a seamless rhino skin texture and added that over the whole texture as well. The rest I painted in from the wrinkles in the face to the dirt and grime on the feet and body.


.
Subscribe to:
Comments (Atom)


